Contents |
|

STEP 5: Tapping and Final Positioning of Implant
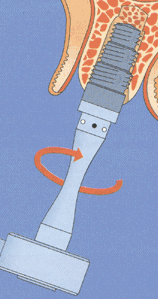
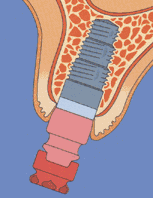
This step involves tapping of the implant using the seating instrument and a surgical mallet. The mallet should be used only lightly so as to achieve initial stability. The placement head is then removed and the implant driver is placed into the internal hex of the implant, attached to a ratchet. Three full clockwise turns is done to place the implant into its final position.
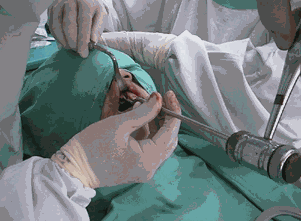
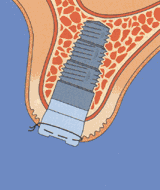
The cover screw is then placed and tightens with the cover screwdriver. The trapezoidal flap is then reposition forward to an extent that the implant is totally covered. Careful suturing is then done with either resorbable or non-resorbable suture material, either silk or Vircryl are material of choice.
STEP 6: Closure and Postoperative Care
The implants are then left dormant in the bone for about four to six months depending on the quality of bone, for the osseointegration to take place.
Radiographs should be taken from time one week after surgery and again the day of second stage recovery to examine of the state and condition of both bone and implants and its osseointegration.
Prosthetic Steps
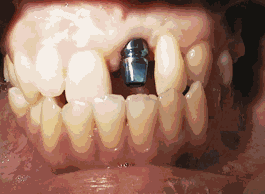
STEP 1 : Exposure of Implant
STEP 2: Taking Final Impressions
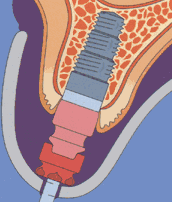
The patient is recalled after several weeks for final impression taking. The gingival former is replaced and an impression coping is introduced and screw tightened into place.
A plastic transfer cap is then placed on top of the transfer coping to enhance accuracy of the impression. Elastomeric impression material such Polysiloxane or Polyether is used for impression taking.
After taking the impression, the impression coping is then removed and gingival former placed back into the implant. The impression coping is then placed into the impression tray for mounting by the technician in the laboratory.
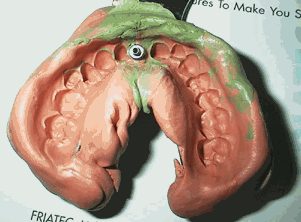
STEP 3: Laboratory Stage
The Impression and abutment (MH 6) is then sent to the laboratory for mounting and the construction of the final crown will now commence.
The technician will now mount the MH 6 Abutment on the model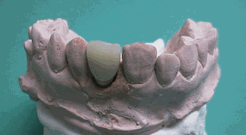 and
cut the abutment accordingly to the unique specifications of the patient.
The porcelain fused to metal crown will then proceed later. Later at chair
side, the shade of the crown is checked to the satisfaction of both the
patient and clinicians expectation
and
cut the abutment accordingly to the unique specifications of the patient.
The porcelain fused to metal crown will then proceed later. Later at chair
side, the shade of the crown is checked to the satisfaction of both the
patient and clinicians expectation
NEXT PAGE>>>>
Copyright 1999, Ahmad Fariz Hanapiah![]()